Friday, 31 January 2014

Use of the humble cardboard box

Thanks to Creative Jumpstart 2014  (www.nathaliesstudio.com)  who shared uses of the humble cardboard box.

After soaking the pieces of cardboard in water, 
I peeled off the 2 outside sheets to create card
that I can use in a project.  With the crinkle bit 
on the inside I ripped it to pieces & pushed into
the only mould I had.  Once dyed out popped 
these neato hearts which I can't wait to use on 
a project. The card I can see a mini album 
coming up, gotta love them.  Watch this space.

1st Canvas sold

Yes my first canvas sold yesterday, I'm total in awe & have an order for another, feeling so blessed & have 2 others in my head to get out on canvas so plenty to keep me occupied for a while.

 First off I gesso the whole canvas then continued to do so as put the layers on.  Here I have the basic tree ready & have started on the background using a doily.  The bits I cut off I place elsewhere including the edges.  Thanks to Creative Jumpstart 2014  (www.nathaliesstudio.com)  who shared the use of brown paper bags.

My next step was to place in some background using modelling paste, I little tricky with the tree already glued down.


I continued to layer elements & gesso as I went until I was happy with the final result. Lace, buttons, beads, flowers, charms (From https://www.facebook.com/pages/Created-Especially-For-You/370789092950090?fref=ts) & other odds & ends that I save were all used.

At this stage after a number of gesso layers I had it drying on my table waiting for pastel sprays to arrive.  Yes I had plans to add more colour.  It was seen by someone who fell in love with it & promptly bought it.  Perfect for the redecoration of their bedroom they said.  Its now sealed & awaiting pick up tomorrow.

Tuesday, 28 January 2014

Sharray's Canvas

Recently my closest companion for nearly 16 years passed away.  Here is my memorial canvas of her.  The photo was one I had taken with an old phone in her prime.  I never had a camera then.  On the canvas are her tags including her microchip on, part of her collar & a nail.  Sharray loved the beach when she was young & you just had to say get the birdies & away she would run do a big ark & return to me with a smile on her face & do it again.  In her older age she discovered various types & sizes of lizards. They would sit in a staring out competition until I bought her inside long enough for the poor lizard to escape to shade.  Sharray would go look for it then give up & come back in for a drink & shade herself.  She was my angel through many hard times & I thank God for her.  Gone but never forgotten.

 After a coat of gesso I used modelling paste & stencils to create a background, not that in the end you can see much of it.

I made a tree out of a brown paper bag Thanks to Creative Jumpstart 2014  (www.nathaliesstudio.com)  who shared the use of brown paper bags & put a doily on.  I used the extra bits to put along the sides of the canvas.  I found it easier to gesso as I went.

The lace was a very wide wide.  Some I cut to put along the top & the rest for the bottom & sides.  Lizard was from the cheapy shops, Aramaic I think.  I also sealed the photo to protect it in the colour stage.  

Here I have added some tags, part of her collar, the clip I wore when we were in the show ring & flowers.  Gesso as I went.

 More flowers, charms (from Created especially for you - https://www.facebook.com/pages/Created-Especially-For-You/370789092950090).  Birds next is beads in a bottle cap.

One flower came apart so I use it as it was for a change, bling added.  I also twilled the wire from the flowers.

 Angels, hearts, butterflies, birds added all reflecting who Sharray was.  The white fluff bits are bits of a stretchy bandage I cut up & teased out.  Took a few coats of gesso to cover the colours.

I add the word "devoted".  This is it just 
before I applied colour.

  
The finished piece I really pleased with it.
  Thanks to Creative Jumpstart 2014  (www.nathaliesstudio.com)

I used the pointy end of a skewer to add the lines in the 
clip.  First up I painted Copper on the edges & in a bit.  Covering the photo I sprayed mustard seed around it.  Brushed sage & evergreen bough, some with perfect pearls green patina in it were used for the rest of the area.  I then sprayed granite in some areas to tone it down & applies perfect pearls heirloom gold on the watch.  With a tiny brush I added accents of copper throughout the canvas.  

Its going to look lovely hanging on 
my wall in my photo gallery. 

Steam punk canvas

This piece I have been working on for a while...........

Step 1:  I painted the canvas then using stencils & modelling paste I placed various cogs around. Still working on how you colour paste, this was supposed to be purple, think I need inks rather than adding paint.

Step 2:  Was to create & glue or modelling paste down the items where I wanted them.  This was the pic of the basic layout.  The man I cut from tin & put holes in it to look like the old micano sets kids built with. When I put it down I created a butterfly then cut open metal decorative circles I had to make the flowers with.  I threaded 3 beads on wire to make the center of them.  Following is a series of pictures as I took as I coloured the canvas.  Finally figured out you need to heat set as you go to get the vibrant colours I was after.

 This was just after my first spray & it dried very flat looking.


Finally I added a pile more colour to reach this stage & put perfect pearls over the man to lift them out a bit.

Decided to repaint the edges & bring it in a little creating a shadow around the man.  Also use sharpies, brush felts & paint to highlight a few bits.  Actually that was fun got a wooden skewer out for the circles was the perfect size.

 Thanks to Creative Jumpstart 2014  (www.nathaliesstudio.com  for this technique.  

Am I finished?  I think so but won't seal it for a while just in case.  I also need to find a good spray sealer rather than
hairspray which I'm told can yellow over time.

Update: 22 March, I have sealed this piece with the proper sealer some weeks ago, today it sold & went to its new home.  Enjoy!

Shoe

This shoe will hold a mobile phone or other goodies & was made for my daughter in loves 30th birthday.  The last to turn 30 until the grandchildren which is years away.  A little belated gift, yes I tarried in the creating despite having bought the basic frame 2 years ago knowing it was perfect for her.  A couple of close up pics are included to show the other side.


 Back of shoe.


Monday, 13 January 2014

Creative Jumpstart 2014 - various items

I have decided to have a post just for creative Jumpstart 2014 as I have journal pages to share as well.  Its only the 14 of Jan & I have really enjoyed & loved what I have learnt & have so many new ideas floating around in my head including a memorial picture of my beloved Sharray (poodle) who was my faithful companion for nearly 16 years.  Only buried her a few days ago so the grief is very fresh, God has be blessing me with remembering so many beautiful times we had together, she was my angel to help me through until I was healed.  My darling I will walk the beach again this year without you, but see it through your eyes, a wondrous playground & never will I cease to be thankful for the unconditional love you gave me.  Dance with the angels my darling.

Tag using rubber cut to make design in modelling paste.
 As soon as I watched the video I knew I had to do a tree stump in a field of flowers with of course butterflies everywhere.  First I sprayed the background with distress ink (evergreen bough) & perfect pearls (green patina).  With a few pencil marks I lightly marked where I wanted the modelling paste to go then run the cut rubber around in a circle.  When it was dry I used distress stain ( gathered twigs & walnut stain) to colour it.  Next I placed glue around to create the look of a field of flowers & sprinkled heather mixture from Javis countryside scenic products.  I mixed up a spray of mustard seed to colour the flowers & glued them & the butterflies down. I cut 2 decorative shapes in half & glued on the corners (from https://www.facebook.com/pages/Created-Especially-For-You/370789092950090?fref=ts ). Put the background cardstock of butterflies on then added the word, ribbon & lace.  My version of looking down on a small area of nature.
Back.

Wednesday, 8 January 2014

Tim Holtz tags 2014

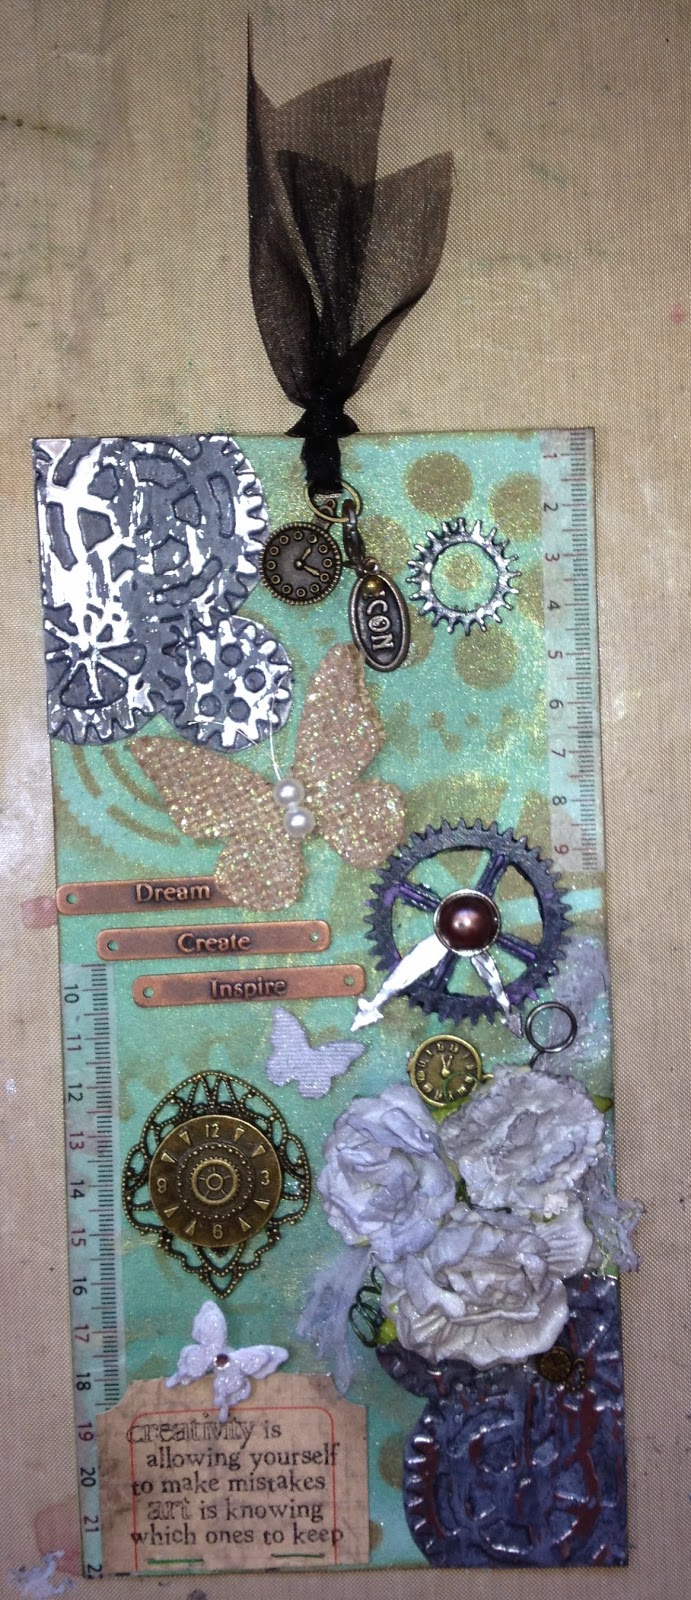
Ok thought I'd give it a go this year.  Whoops on the first tag I have no clock die so I have created my version using what products I do have.  Had fun all the same.  By the way the cog with the hands attached is from a tape runner, yep I pull anything & everything apart to get bits that I can use.  Also doing Creative Jumpstart 2014, you can check them out at: www.nathaliesstudio.com  Was also the first time I mixed up my own spray for the background using distress ink (evergreen bough) & perfect pearls (green patina), gee that was lots fun & so easy to do.  Next I stencilled & embossed the cogs with metal - (empty drink tin would do here).  Decided it needed some extras so added flowers & butterflies & Spitz with glimmer mist (granite - the only one I have).  Defiantly on my list to buy this year is more distress ink & perfect pearls . So here's my first tag for 2014 what do you think, must add its the biggest one I have ever done.


Tuesday, 7 January 2014

Playing with butterflies


Had saved this ice-cream stick thinking  hmmm interesting shape will be handy  day.  Presently watching 

Creative Jumpstart 2014 

its amazing & decided to use an idea with thread wrapping
& the ice-cream stick thinking I'd get a butterfly - maybe it turned out more like a dragonfly, either way its rather cool.  I ran some tape along the ice-cream stick & started winding the thread in from both ends as only had limited thread left.  I started at the ends as it was easier to lay the loops on top of one another.  The last bits I twisted & glued down to show where it had been flying.  The wire I used for the antennas came from around an item I bought recently.  I threaded the beads on (from an old necklace), wrapped it around & then twisted it to make the antennas.  For the rest of the card I kept it pretty simple as the paper is so glittery, just layered it up to make it pop. 


I also created this one for a customer who wanted butterflies & teddies.  Had fun inking & sticking all the bit on.


Next I wanted to try my hand at a lace & bead butterfly.
This card just has to have great grandma added to it
& will be winging its was of to the same customer.